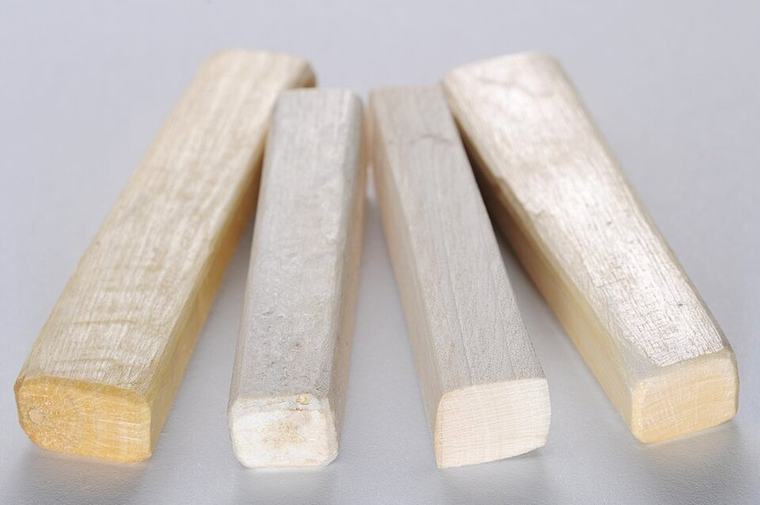
A self-paced elective in woodworking: hand and power tools, joinery, finishing, home carpentry, and shop safety.
Elective Self-paced. It is not part of the daily schedule, so it can be taken over a summer, spread across a year, or left out entirely.
One course, offered four ways. Woodworking is self-paced, and the same course is listed under Grade 9, Grade 10, Grade 11 and Grade 12 so it can be counted as a credit in whichever year a family takes it. The lessons are identical; take it whenever it suits.
This elective teaches woodworking from the ground up, beginning with the dignity of skilled work and the habits of a safe shop. It covers hand tools and how to use and sharpen them, the common power tools and what each one demands of the person running it, joinery from butt and lap joints through dados, pocket holes, and an introduction to dovetails, measuring and planning work including cut lists, scaled drawings, fractions on a tape measure, and board feet, finishing with sandpaper, stains, oils, varnish, paint, and wax, ten beginner projects from a cutting board and birdhouse up to a step stool, tool tote, and small bench, home carpentry such as framing, shelving, hanging a door, trim, and furniture repair, and the wood itself: softwoods and hardwoods, plywood and engineered sheet goods, grades and lumber-yard terms, reclaimed stock, wood movement, storage, and responsible sourcing. Every lesson opens with a verse from the King James Bible, and the closing unit turns toward patience, learning from mistakes, caring for tools, apprenticeship, honest pricing, and building things for the church and community.
The course is 10 units of 10 lessons each, 100 lessons in all, self-paced rather than tied to a daily schedule. A lesson is a short reading, usually 300 to 720 words, followed by a ten-question multiple-choice quiz that grades itself. The writing is plain high school prose that names each tool and term as it introduces it, so a student with no shop background can follow it. Arithmetic with fractions is used often enough that it is worth being comfortable with, and the course teaches how to read a tape measure directly.
Please read this part carefully. Safety is taught seriously and in detail throughout, not tucked into one lesson. The course covers eye, ear, and respiratory protection and when a paper dust mask is not enough, why gloves are wrong around rotating tools, never removing guards or cutting freehand, table saw kickback and where to stand, ventilation and fumes when finishing, and the fact that rags soaked in oil finish can catch fire on their own if they are piled up, along with the exact disposal steps. That instruction is real and worth having, and it is also only reading. Finishing the lessons and passing the quizzes does not make a student shop-safe, and this course does not certify anyone to operate anything. Nothing here checks a setup, a stance, or a cut. Doing the projects requires real tools, a workspace, materials to buy, and hands-on adult supervision from someone who is competent with the tools involved, especially before a student ever touches a table saw, circular saw, miter saw, or router. Please treat the reading as preparation for supervised work and decide for yourself which tools your student is ready for. A student with no tools can still complete every lesson and quiz, and working through the course first is a sensible way to decide what to buy and in what order.
What the course covers
Shop setup, safety habits, and personal protective equipment
Hand tools: saws, chisels, planes, clamps, squares, and sharpening
These photographs appear in the lessons themselves, not just on this page. Every one is freely licensed and credited to its photographer at the foot of this page.
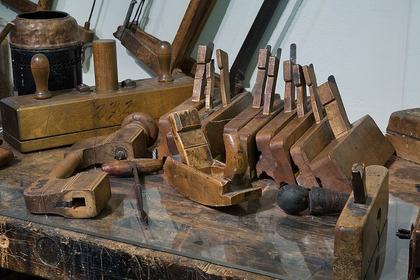
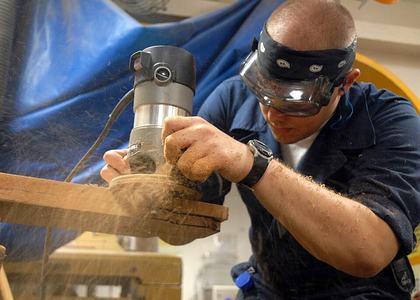
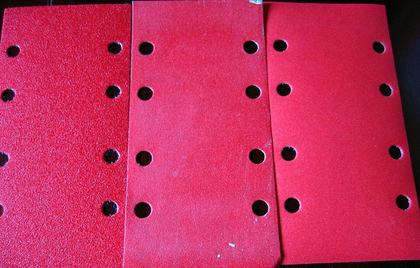
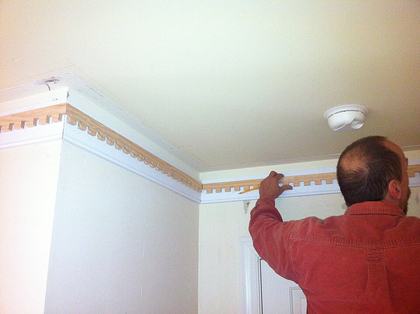
Why Learn Woodworking? Craftsmanship and StewardshipJorge Royan / Wikimedia Commons / CC BY-SA 3.0The Router: Edges and JoineryU.S. Navy photo by Mass Communication Specialist 2nd Class Remus Borisov / Wikimedia Commons / Public domainSanding Progression: Coarse to FineRanveig / Wikimedia Commons / Public domainBasic Trim and MoldingThe Finishing Company Richmond Va / Wikimedia Commons / CC BY 2.0
Every lesson, by title
All 100 lesson titles are listed here — nothing is withheld until you download. Open a unit to read its contents.
Unit 1: Why Woodworking? Foundations, Stewardship & Safety 10 lessons
1Why Learn Woodworking? Craftsmanship and Stewardship10 q
2Jesus the Carpenter: Work and Dignity of the Trades10 q
3Types of Wood: Softwoods vs. Hardwoods10 q
4Understanding Wood Grain10 q
5Setting Up a Safe Workshop10 q
6Essential Hand Tools Every Beginner Needs10 q
7Measuring and Marking Accurately10 q
8Reading a Simple Woodworking Plan10 q
9Shop Safety Rules and Habits10 q
10Planning Your First Project10 q
Unit 2: Hand Tools Mastered — Saws, Chisels & Precision 10 lessons
1The Hand Saw: Types and Uses10 q
2Hammers, Nails, and Basic Joinery Fasteners10 q
3Chisels and Safe Chiseling10 q
4Planes: Smoothing and Shaping Wood10 q
5Screwdrivers, Screws, and Drilling by Hand10 q
6Clamps: Holding Work Steady10 q
7Sanding and Surface Preparation10 q
8Squares and Levels for Accuracy10 q
9Sharpening and Maintaining Hand Tools10 q
10Building a Basic Tool Kit10 q
Unit 3: Power Tools Essentials — Safety, Speed & Accuracy 10 lessons
1Power Tool Safety Fundamentals10 q
2The Circular Saw10 q
3The Jigsaw10 q
4The Power Drill and Driver10 q
5The Random Orbital Sander10 q
6The Router: Edges and Joinery10 q
7The Table Saw: Respect and Caution10 q
8The Miter Saw for Accurate Cuts10 q
9Dust Collection and Workshop Cleanliness10 q
10Choosing the Right Tool for the Job10 q
Unit 4: Strong Joints — Connections That Last 10 lessons
1What Is Joinery? Why It Matters10 q
2The Butt Joint10 q
3The Lap Joint10 q
4The Miter Joint10 q
5The Dado Joint10 q
6The Dovetail Joint (Introduction)10 q
7The Pocket-Hole Joint10 q
8Wood Glue: Types and Proper Use10 q
9Clamping Techniques for Strong Joints10 q
10Choosing the Right Joint for a Project10 q
Unit 5: Measure Twice, Cut Once — Planning & Precision 10 lessons
1Understanding a Cut List10 q
2Reading a Scaled Drawing10 q
3Fractions on a Tape Measure10 q
4The Rule of Measure Twice, Cut Once10 q
5Board Feet: Estimating Material Needs10 q
6Squaring Up Rough Lumber10 q
7Marking Layout Lines Accurately10 q
8Common Woodworking Symbols and Terms10 q
9Adjusting Plans for Your Own Project10 q
10Creating a Simple Materials List10 q
Unit 6: The Art of Finishing — Sanding, Stains & Protection 10 lessons
1Why Finish Wood? Protection and Beauty10 q
2Sanding Progression: Coarse to Fine10 q
3Wood Stains and How They Work10 q
4Applying Stain Evenly10 q
5Oil Finishes: Danish Oil and Tung Oil10 q
6Polyurethane and Varnish10 q
7Paint on Wood Projects10 q
8Wax Finishes and Furniture Care10 q
9Ventilation and Finish Safety10 q
10Choosing the Right Finish for a Project10 q
Unit 7: Build Your First Projects — Boxes to Benches 10 lessons
1Planning a Simple Cutting Board10 q
2Building a Basic Shelf10 q
3Making a Small Wooden Box10 q
4Building a Birdhouse10 q
5Making a Picture Frame10 q
6Building a Simple Step Stool10 q
7Making a Tool Tote10 q
8Building a Small Bench10 q
9Repairing a Wobbly Chair10 q
10Finishing and Presenting Your Project10 q
Unit 8: Home Carpentry — Framing, Shelving & Repairs 10 lessons
1Framing Basics: Studs, Joists, and Rafters10 q
2Reading a Simple Blueprint10 q
3Building a Basic Wall Frame10 q
4Installing Shelving in a Home10 q
5Hanging a Door10 q
6Basic Trim and Molding10 q
7Repairing Squeaky Floors10 q
8Patching and Repairing Wood Furniture10 q
9Working with Plywood and Sheet Goods10 q
10Estimating a Home Carpentry Project10 q
Unit 9: Understanding Wood — Materials, Movement & Selection 10 lessons
1Common Softwoods: Pine, Cedar, and Fir10 q
2Common Hardwoods: Oak, Maple, and Walnut10 q
3Reading a Lumber Yard: Dimensions and Grades10 q
4Reclaimed and Salvaged Wood10 q
5Plywood, MDF, and Engineered Wood10 q
6Choosing Wood for Outdoor Projects10 q
7Wood Movement: Understanding Expansion and Contraction10 q
8Storing and Stacking Lumber Properly10 q
9Sustainable and Responsible Wood Sourcing10 q
10Budgeting for a Woodworking Project10 q
Unit 10: The Lifelong Craft — Excellence, Growth & Community 10 lessons
1What Makes Work Excellent? A Biblical View of Craftsmanship10 q
2Patience and Persistence in Skilled Work10 q
3Learning from Mistakes in the Shop10 q
4Caring for Your Tools Long-Term10 q
5Building to Last: Quality Over Speed10 q
6Selling or Gifting What You Build10 q
7Woodworking as a Family Skill10 q
8Apprenticeship and Learning from Others10 q
9Woodworking in Church and Community Service10 q
10A Lifelong Craft: Continuing to Grow10 q
One whole lesson, exactly as it comes
This is a real lesson taken from the middle of the course — the teaching text, the practice, the homework, and the first three quiz questions with their answers. It is not a marketing excerpt.
Unit 6: The Art of Finishing — Sanding, Stains & Protection · Lesson 1
Why Finish Wood? Protection and Beauty
Why Finish Wood? Protection and BeautySimon A. Eugster / Wikimedia Commons / CC BY-SA 3.0
When you finish a woodworking project, you've invested countless hours designing, selecting materials, cutting, joining, and sanding. The wood itself is beautiful, but applying the right finish is what transforms your hard work into something that will truly last and shine. Understanding why we finish wood helps you make better choices about which finish to use and how to apply it.
Protection is Essential
Wood is a living material, even after it's been harvested and dried. It wants to absorb and release moisture from the air around it, which causes it to swell and shrink. This movement can crack your carefully made joints, warp flat surfaces, and invite mold and insects to damage your work. A good finish is a barrier between the wood and the moisture in the air. Stains, oils, and polyurethanes all create a protective layer that slows this moisture exchange dramatically. The better the finish, the longer your project will protect itself and remain beautiful.
Beauty and Color Enhancement
Have you ever noticed how raw, sanded wood looks dull and chalky? That's because the cellular structure of the wood scatters light in random directions. When you apply a finish—especially an oil or varnish—the wood comes alive. The finish fills the grain, adds depth, and makes the natural colors glow. Stains can enhance or completely change the color, bringing out character in different wood species.
Professionalism and Stewardship
Finishing wood properly is how you show respect for the materials God has given you. Your woodworking projects, finished well, reflect your care and skill. When you give a finished piece to someone, they see that you valued the work enough to protect it and make it beautiful. This is good stewardship of what God provides. A well-finished piece can last generations, becoming a family treasure.
The first three of this lesson's 10 questions
What is one main reason wood naturally absorbs and releases moisture?
Wood is a living material, even after harvesting and drying
Sawdust particles attract humidity
Moisture helps prevent cracking
Wood needs water to maintain its color
Show the answer
Answer: Wood is a living material, even after harvesting and drying
What does applying a finish primarily do to protect wood?
It hardens the wood fibers permanently
It completely stops all moisture movement
It makes the wood waterproof forever
It creates a barrier that slows moisture exchange
Show the answer
Answer: It creates a barrier that slows moisture exchange
According to Proverbs 22:29, what happens to a man diligent in his business?
He will have no troubles
He becomes wealthy immediately
He shall stand before kings; he shall not stand before mean men
He will work alone
Show the answer
Answer: He shall stand before kings; he shall not stand before mean men
Another 7 questions follow in the lesson itself, each one graded the moment it is answered.
What comes with the download
100 full lessons
Across 10 units, each with objectives, a teaching passage written to be read aloud, guided practice, and homework.
1,000 quiz questions
Graded the instant they are answered, each with the explanation of why that answer is right.
A gradebook that works
Every score kept, a running average maintained, and a breakdown unit by unit — all in the file itself, nothing sent anywhere.
Progress and attendance
Tick lessons off as they are finished, watch the completion bar fill, and mark days present, absent, or excused.
Report card and certificate
Both printable, with your student's name, the grades, and the dates already filled in.
Backup you control
Export every record to a file you keep, and read it back later. A lost browser cache cannot take the year with it.
An answer key
Hidden from the student by default, there for the parent marking the work.
Nothing that phones home
No ads, no affiliate links, no analytics, no fonts fetched from elsewhere. Unplug the network cable and every one of these files still works.
What you will need
Drawn from the materials named across all 100 lessons of this course. Most families already own most of it.
No lesson in this course names a material of its own, so there is nothing to buy before you begin. The Grade 11 supply list gathers what the rest of the year needs.
Download Woodworking — Grade 11
Free, and free of everything else. 17 files, 50.8 MB in total. No account, no email address, no payment. What you download carries no advertising, no affiliate links and no tracking of any kind.
Use it on a screen
Open any of these straight from a folder or a USB stick. They run in the browser with the network cable unplugged, and nothing is ever sent anywhere.
Every photograph on this page is used under a free licence, and is credited here as that licence requires. Photographs are part of the curriculum itself, so they travel with the download as well.
Why Learn Woodworking? Craftsmanship and Stewardship — Jorge Royan / Wikimedia Commons / CC BY-SA 3.0
The Router: Edges and Joinery — U.S. Navy photo by Mass Communication Specialist 2nd Class Remus Borisov / Wikimedia Commons / Public domain
Sanding Progression: Coarse to Fine — Ranveig / Wikimedia Commons / Public domain
Basic Trim and Molding — The Finishing Company Richmond Va / Wikimedia Commons / CC BY 2.0
Why Finish Wood? Protection and Beauty — Simon A. Eugster / Wikimedia Commons / CC BY-SA 3.0